Roomie Nachos

IMG_2495

This is a meal born from the reality of being a busy mom with a crazy schedule sometimes. I didn’t just want to say working mom because even in the days when I was a stay-at-home mother of three kids, I still ran around like a crazy person all day and dinner needed to be quick! Now I’m a working mom of one child at home and two off in college, still some nights get busy and dinner is a scramble. Since my youngest and I are now the only ones home (with dad working in Abu Dhabi) I call her ‘My Roomie’! (Daniela’s not sure how she feels about that yet but it sure makes me feel young!) I came up with this quick filling fun meal out of pure desperation to EAT!

IMG_2485

Use your imagination and build these Nachos with what you have on hand! There are no fast rules. Start with your favorite nacho chips (healthy or not), shredded cheese (any kind you like works as long as it can melt), ground meat (beef, turkey), salsa, guacamole, scallions, jalapeños, and any other favorites you like (black olives, etc.)

IMG_2490

Cook the ground meat all the way through…breaking it up so it’s crumbled.

IMG_2488

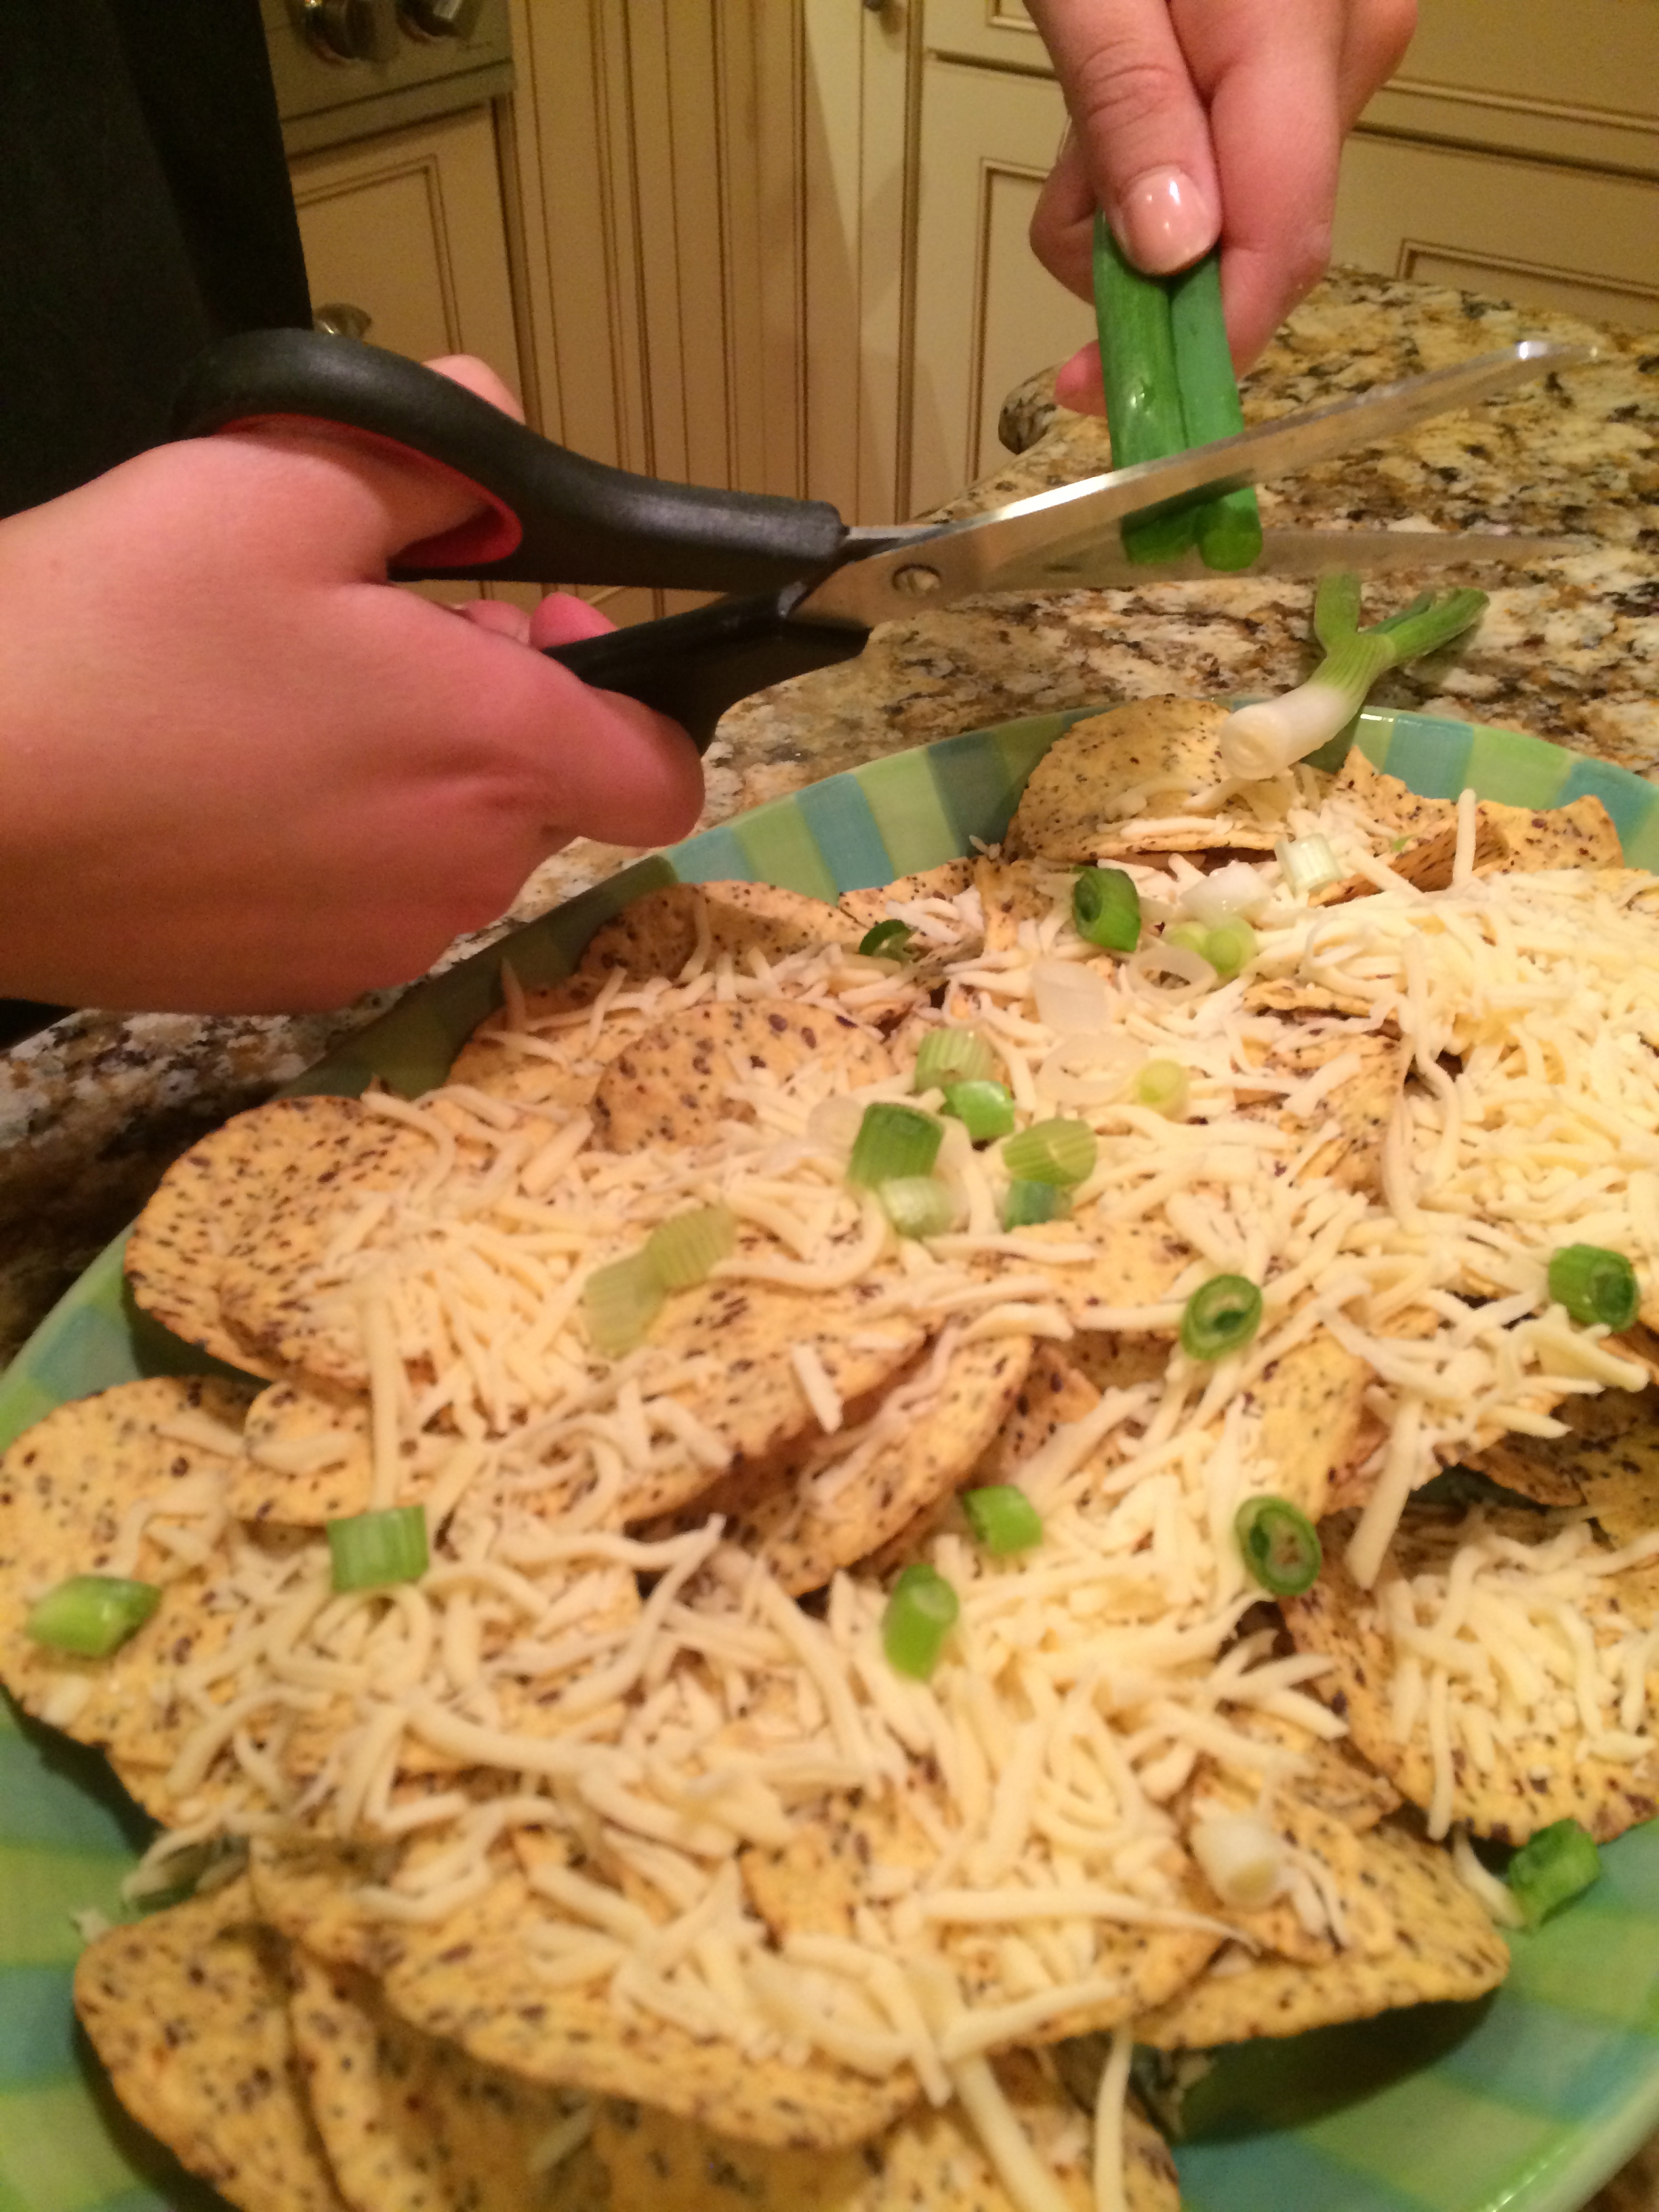
Get your ‘Roomie” involved in the process it makes it feel more like your roommates 🙂 In a heat proof dish, pour in the chips, spread the shredded cheese, and we like to use scissors to cut the scallions across the top.

IMG_2491

Once the meat is done, pour it right over the cheese and chips. I don’t have to drain this meat because I use the grass-fed organic ground beef that’s the leanest, almost no grease left in the pan. If you are using another ground meat that produces access grease, you will want to drain it before you pour it over the cheese and chips. ADD more cheese and the sliced jalapeños.

IMG_2494

Place the dish of nachos into the oven to broil. I don’t have a microwave in the kitchen…didn’t want to sacrifice cabinet space when we redid the kitchen and we do very well without it. If you have a microwave you can use it now to melt everything together.

IMG_2495

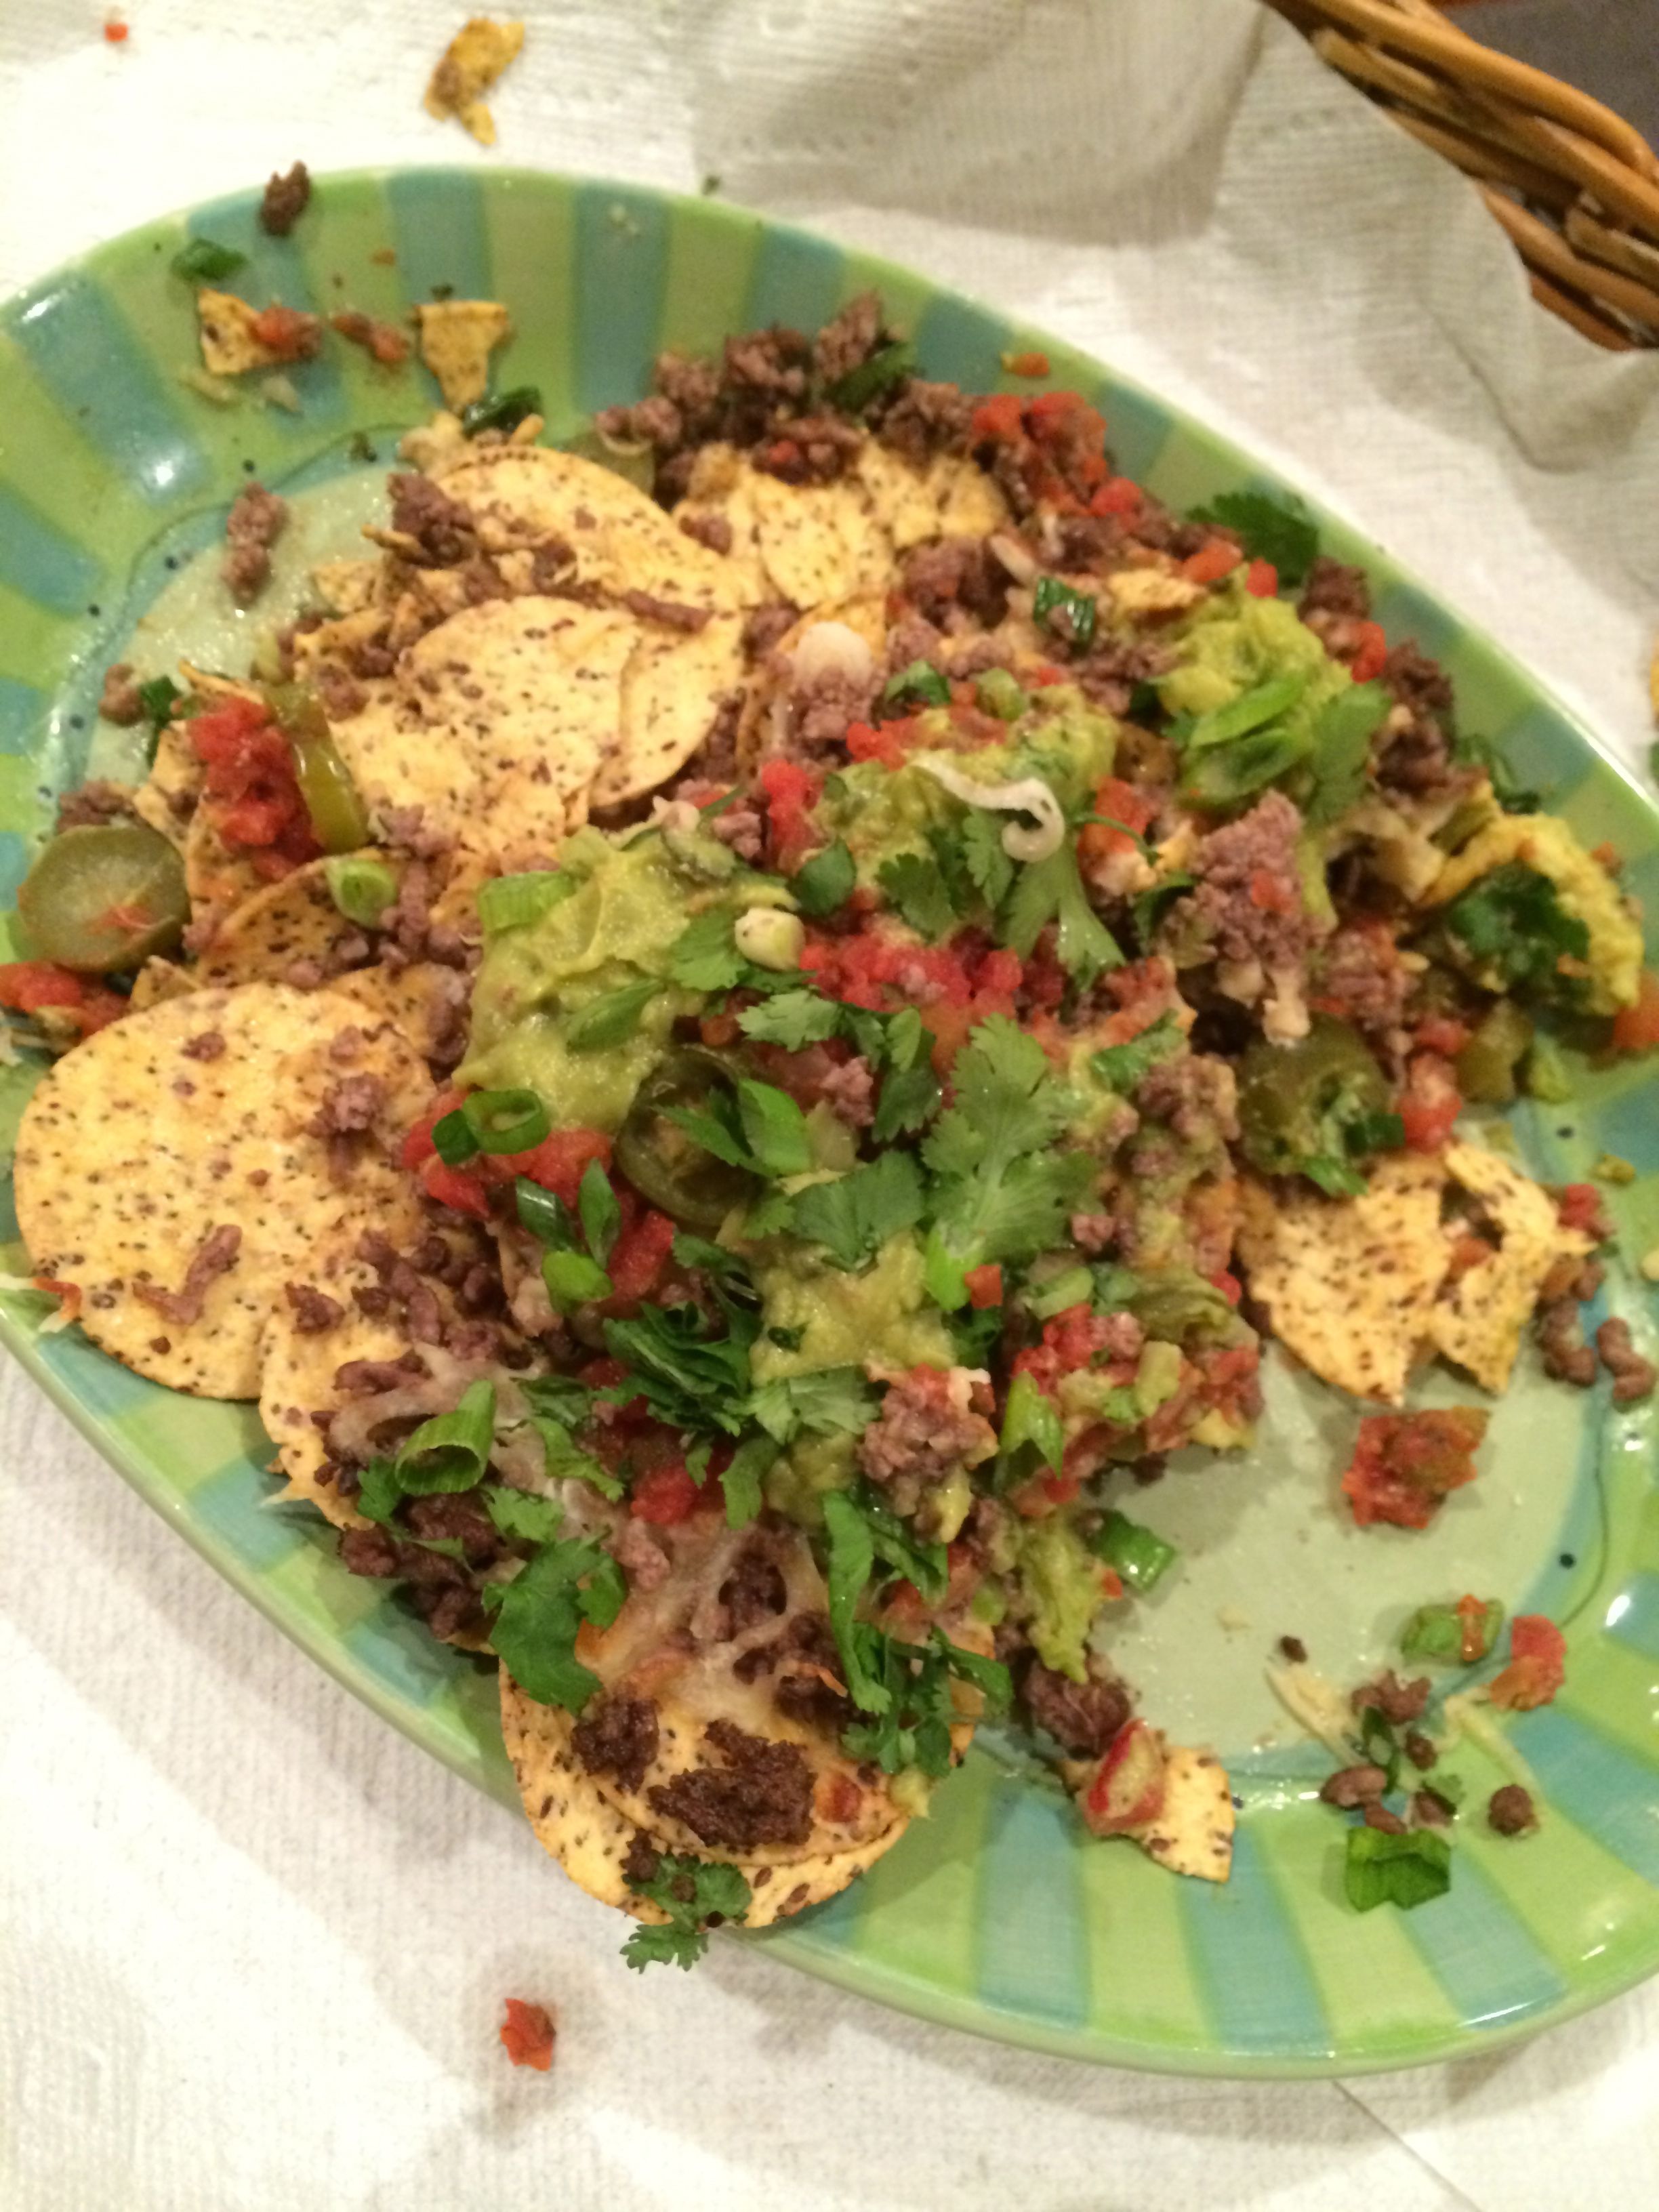
Once they are out of the oven…KEEP building! Add the salsa, guacamole, more scallions, and some cilantro chopped across the top.

READY…SET…EAT!!!!

This is why I call it Roomie Nachos! We use only our hands, eat over the dish, while sitting on the couch next to each other!! Brings back memories of college!! Best part…no extra dishes to clean up 🙂

IMG_2500

We can put a pretty good dent in these!! YUM!!

Love you Roomie…thanks baby!

Sausages with Fagioli All’uccelletta

You know a recipe is worth making when your son wakes up and says that it was in his dream! My children love this recipe and it is easy and quick to make. From stove to table in 35minutes 🙂 Have all the ingredients ready & prepped, and you’ll be eating a delicious hearty meal before anyone has a chance to ask…”Is dinner ready yet?” The original recipe, Turkey Sausage with Spicy Beans,  is from the Cooking Channel show, Extra Virgin by Debi Mazar (Entourage star) and her husband Gabriele Corcos. My son (Danilo) and I were watching Extra Virgin one day and right after the show, we decided we would make this dish that night for dinner. It was delicious and became our favorite! Soon it will be yours!

IMG_2350

Start by prepping all your ingredients to make your cooking  go quickly. This recipe can be doubled for the size of your family and appetites. This amount is great for entertaining close friends and feeds about 6-8. You can always double it if you have more friends drop by!

Start with a package of 8 Italian turkey sausages mild (or hot), 4 cans cannellini beans rinsed and drained, 1-2 lbs cherry tomatoes washed and cut in half (start with one pound when you first make it and see if next time you want more), 5 dry or fresh bay leaves, and fresh chopped Italian parsley.

IMG_2356

Start by adding some olive oil to your favorite nonstick pan and brown the sausages on all sides. Once the sausages are browned, remove them from the pan and keep warm, you will add them back later. The pan that I am using is remarkable when it comes to even cooking and easy clean up. Nothing ever burns or sticks to this authentic 6 quart Italian terracotta pan. Look up your favorite pan and size and treat yourself. I got this one for $20 on clearance online at Sur La Table…a real treat!! Considering it’s on Amazon right now for much more! The brand is Piral and you can find them all over the internet.

IMG_2357

Once you remove the sausages, add 4-5 chopped garlic cloves to the pan, lower the heat and stir for a minute.

IMG_2358

To the wonderful smell of the garlic, add the halved cherry tomatoes and stir together. The tomatoes will start to release their juices.

IMG_2360

It’s time to add some spicy dry chili flakes, salt & pepper to the tomatoes and stir it all together. Lower the flame and let the tomatoes soften and release their juices blending with the garlic, cover with a lid for about 10 minutes.

IMG_2361

Add back the sausages with the 4 cans of cannellini beans and four bay leaves. Mix, cover, and continue to cook for about 10 more minutes until all the juices combine and warm all the way through. Add a dash of chopped fresh parsley just before serving.

IMG_2363

When it’s finished…serve warm with some crusty bread & wine. You will soon understand why my son has dreams that include this meal! Enjoy!

IMG_2367

Ingredients:

1/4 olive oil

1 package 6-8 Italian Turkey Sausage

4-5 minced garlic cloves

1-2 lbs cherry tomatoes

4 cans cannellini beans

4 fresh or dry bay leaves

dry hot chili pepper flakes (to taste)

salt & pepper

Italian flat leaf parsley chopped

Rustic Drop Biscuits

IMG_2478

This recipe is easy whether you use a food processor or the back of a fork…you’ll get the same flakey biscuits for breakfast, lunch, or dinner. On those lazy weekend mornings or those cold Snow Day no school mornings (our fav!!) you’ll love these light flavorful biscuits with your favorite toppings…or just plain 🙂

Let’s get started…preheat your oven to 400* degrees.

IMG_2464

Start by adding 2 cups all purpose flour to a large bowl or food processor

IMG_2465

Add 2 teaspoons of baking powder

IMG_2466

A 1/4 teaspoon salt

IMG_2467

Add 1 stick Unsalted COLD butter cut into little pieces. This will make it easy to cut into the flour.

IMG_2468

I’m using a food processor to quickly whirl all the ingredients together. Pulse the flour and butter until it looks crumbled. A few pulses. If you are using the back of a fork or pastry cutter, you cut the butter into the flour until you get the same result.

IMG_2469

Once you have crumbled the flour and butter together with all of the other dry ingredients…it’s time to add the half-n-half. (you can add whole milk, 2% milk, or buttermilk). The fattiness of the milk will add to the rich flavor of these flaky buttery biscuits.

IMG_2470

Measure 1 cup of Half-n-Half, start to pulse the flour in the food processor, pour the milk in slowly thru the pouring spout until the mixture starts to form a dough. DO NOT OVER PROCESS! Just as the dough starts to come together STOP!

IMG_2471

If you over process the dough it will become too wet and when it bakes it will not be as flaky. If your mixing this in a bowl use your hands to bring the mixture together and again, don’t over work the dough. Just as it starts to come together, STOP.

IMG_2472

Using a tablespoon, scoop & drop some biscuits on an ungreased cookie sheet. Your over has been preheated to 400* degrees. Space the biscuits about an inch apart but maximize the space on the pan. Place them in the oven and set your timer for 18-20 minutes.

IMG_2474

After 18-20 minutes in the oven…these delicious crumbly biscuits are ready to be served warm from the oven! Yummy!!

IMG_2476

The perfect quick breakfast for a great lazy weekend morning OR for those wonderful surprise snow days off from school!! Relax and enjoy!

IMG_2477

Next to that cappuccino, you can have your biscuit filled with homemade berry jam from the summer with some soft butter OR these biscuits are great for a sausage and gravy hardy biscuit breakfast!

Ingredients:

2 cups all-purpose flour

2 tbsp baking powder

1/4 tsp salt

1 stick unsalted COLD butter

1 cup Half-N-Half

Garlicky Jalapeño Peppers

In our home, we are garlic fanatics! If a recipe ever calls for 2 cloves of garlic, I am for sure adding 5-6…that’s just the way it is. So if your following any of my recipes, please know you can always scale back on the amount of garlic…it’s probably inflated anyway 🙂

This recipe comes from my older sister, Gordana, who adapted it from an original recipe of Garlicky Roasted Red Peppers, which we all love and frequently make for gatherings. There’s nothing better then the smell of roasting peppers on the grill in the summer. If you haven’t stocked your freezer from the summer grilling season, you can still enjoy these peppers in the winter. I’ll spare you all the stories of how we go out to the farms and get bushels of the perfectly shaped red bell peppers for the original dish and how we spend whole afternoons grilling and peeling our fingers raw. None of that now…here’s the Jalapeño version which my husband loves…and why I started to make them.

IMG_2305

Start with some large firm jalapeño peppers.

(That’s a cutting board my son made for me in woods class…love the different colors he used!)

IMG_2302

Line a 11X17 sheet pan with foil, spray with oil,  and spread the peppers out in one layer.

IMG_2303

Place the peppers in a preheated 450* oven to roast.

IMG_2312

Bake for 25-30 min turning occasionally until all the sides look charred and roasted.

IMG_2326

They should look something like this when you remove them from the oven. For this next step you need to work quickly… so have everything ready to move fast.

IMG_2328

Have another pan ready to place all the peepers into and cover. A pan with a heavy lid works best. This step is meant to steam the peppers a bit so they begin to shrivel away from the roasted skins making it easier to peel away the skins. Let them sit for just a while (5min). If you have latex gloves, they will help to keep your fingers from getting hot. If not…do your best to remember NOT to touch your face with your fingers for a while!        The spicy part of the peppers are the seeds.

IMG_2332

The peppers should still be very warm and you should try to peel quickly. Once the peppers cool, it gets harder to peel away the skins.

IMG_2331

Separate the skin, core, stem away from the rest of the pepper flesh.

IMG_2333

Start to layer the pepper flesh in the container they will marinate in with the garlic. I like to use one of those freezer containers that have a strong seal lid so the smell will not leak out into the refrigerator.

IMG_2335

Time to get the garlic ready!!!

IMG_2340

I really can’t tell you how many garlic cloves to use…as you can see…I use a lot! I would say this is were you use your judgement and family preference. Somewhere between 12 and 24 depending on the number & size of peppers you need to cover.

IMG_2342

Using a garlic press, crush the garlic and start to alternate layering of jalapeño peppers, garlic, olive oil & a little salt. For each layer, spread the garlic and oil all over the peppers so it all infuses.

IMG_2344

Seal the container and let marinate at room temperature first a few hours and then place in refrigerator.     Keeps well in the fridge for two weeks.

IMG_2347

When you’re ready to serve, layer in a small dish and enjoy! Although they are jalapeño peppers, this dish has just the right amount of bite…if you like it hotter, then when peeling leave more seeds on the peppers.

To make Garlicky Roasted Red Pepper just substitute red bell peppers and follow the same process from roasting to layering. Both recipes are better in the summer when you can grill the peppers. Grilling adds a smoky roasted flavor to the dish.

Ingredients:

thick and meaty Jalapeño peppers

garlic

olive oil

salt

Chicken Soup

After a recent vacation abroad, and spending 22 hours traveling back home, I was really looking forward to being home and cooking in my kitchen. Eating out can really get old quickly as well as do a number on your stomach. I decided that the first meal I’d make after this long trip was my Chicken Soup. Not only does it fill your house with the aroma of home cooking but it is also a great way to sooth and cleanse your stomach. What’s special about my soup is that I use a rotisserie seasoned chicken!

You’ll start with 1/4 cup of olive oil, 3 large peeled carrots, 3 large peeled parsnips, 1 whole washed celery stalk, 1 yellow onion, 1 tablespoon whole black peppercorns and 1 tablespoon salt. Thoroughly wash all vegetables, removing the tops and bottoms. Coarsely chop all the vegetables (or fine chop is fine also).

IMG_2294

Heat the oil and add the vegetables stirring and cooking for about 15 minutes on medium. The soul purpose of this step is to give the soup a nice golden color from the vegetables, so don’t feel you need to cook them all the way through, just enough for the oil to absorb the golden color.

IMG_2296

Once the vegetables are ready, place the whole seasoned rotisserie chicken on top of the vegetables. I like using a rotisserie chicken because it gives the soup a nice roasted flavor and eliminates much of the grease from the chicken making your soup nice and lean.

IMG_2298

Add 6 cups of water to the pot just covering the chicken. Since I am using a pressure cooker, I can only fill liquid to a certain line marked in the pot. Please be aware of your pots limit for water, especially if you are using a pressure cooker. If you are using a regular pot, add enough water to just cover the chicken.

IMG_2299

Once you’ve added the water, you are ready to secure the lid and cook your soup!

IMG_2300

I am using the Swiss made  Kuhn Rikon 12 quart pressure cooker…THE BEST!! It is well worth the cost for its safe and efficient cooking method! Most soups will take just 20-25 minutes to cook. Please be aware of the slow release method of reducing the cooking pressure before attempting to release the lid. If cooking in a regular pot, cook the soup for 1-2 hours adding water as needed along the way. The longer the soup cooks in a regular pot the richer the flavors will be.

IMG_2330

Once the soup has cooked for the required time, use the slow release method  allowing  the pressure to release naturally from the top of the pot. Then you can remove the lid. You now have some options. You can, A) remove and strain the soup only leaving the broth, or B) remove only the whole chicken and separate the meat from the bones. If you choose A, then you can add to the broth thin soup noodles, dumplings, or scrambled eggs  (my kids favorite is watching me add the scrambles egg to the boiling broth as it turns into stringy noodles) along with the chicken meat. Always remove the whole peppercorns from the bottom of the pot. I chose to just remove the chicken and add back the meat to the vegetables making it very hearty. Bring your soup to a boil before adding any new ingredients.

IMG_2336

The broth from this soup is very concentrated and can be frozen. When your ready for a delicious soup for dinner, just add water and bring to a boil! The broth can also be used to add to risotto, mashed potatoes, rice, or any other dish calling for chicken broth.

IMG_2339

Finally, add a dash of chopped fresh parsley before serving!

IMG_2338

Please pull up a chair and enjoy a nice warm bowl of chicken soup! Good for the heart and great for your stomach!

(Add salt and pepper to taste but be kind to your heart!)

Ingredients:

1/4 cup Olive Oil

3 Lg carrots peeled and chopped

3 Lg parsnips peeled and chopped

1 whole stalk of celery chopped

1 Lg yellow onion chopped

1 whole seasoned rotisserie chicken

6 cps water (adjust amount according to your pot)

1 tbsp black whole peppercorns

1 tbsp salt (adjust to taste after soup is finished)

fresh parsley

Directions:

Place all ingredients together in pressure cooker and cook for 20-25 minutes on highest pressure. Using slow release method, allow pressure to release completely before removing lid. Remove lid. Create the type of soup your family likes; with or without chicken and vegetables; with or without noodles, dumplings, or scrambled eggs. Bring soup back to a boil before adding any new ingredients. Just before serving add a dash of fresh parsley.

~Enjoy~